

Installation
Install Instructions
Our headlights are built to go in at home. Everything plugs into your OEM wiring — no cutting, no splicing, no permanent modifications. Start with the overview below, then find your truck for a step-by-step walkthrough.
Per side, first time through
Connects to your factory harness
Nothing permanent, nothing cut
Step-by-Step by Truck
Don't see your truck yet? Message us and we'll walk you through it directly.
The Basics
General Install Overview
-
01
Remove stock headlights
Remove the corner lights (also referred to as marker lights) and the filler panels below the headlights, if necessary. Then unplug and unbolt the stock headlights.
-
02
Install the projector wiring harness
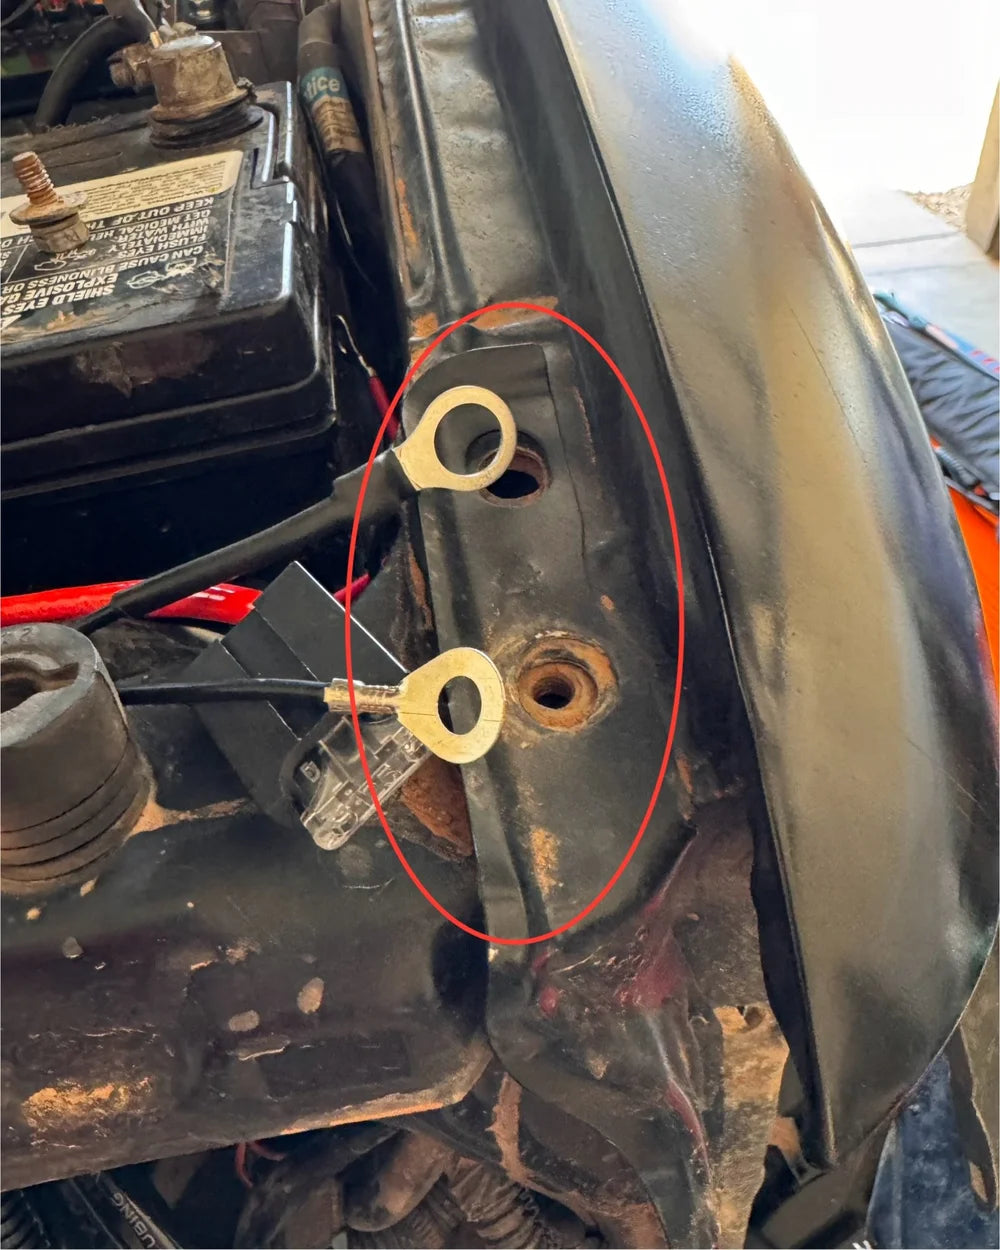
The projector wiring harness is the biggest wiring harness. On the driver side it has one red terminal connector and one black terminal connector — connect these to the battery. On the passenger side, connect the negative (black) terminal connector to the fender bolts to ground it. Make sure there is no rust, paint, or corrosion that can prevent that side from being grounded.
Connect the three-prong H4 connector to the stock H4 plug that was originally plugged into the stock lights. There is only one of these plugs on the harness.
-
03
Install the halo drivers
Switchback halos (white and amber) have three wire colors on each driver: red, yellow, and black. Red is power for white, yellow is power for amber, and black is ground.
There are multiple ways to install these — you can tap the red wire into the marker lights, or tap into the accessory fuse inside the truck. The yellow wire needs to be tapped into the turn signal positive wire, and the black wire can be grounded on the fenders with the other grounds.
-
04
Install the headlights
Connect all the wiring harness plugs into their matching plugs coming from the back of the headlight. Replace the 10mm bolts that were holding the headlights in originally, as well as the corner lights and filler panels if you had to remove them.
Turn on the vehicle and test the lights. Make sure the halos turn on (if you ordered them), make sure the low beams are on, and flick the high beams on and off to confirm they're working correctly. If anything isn't working as it should, check that all of the plugs are securely connected and check your grounds.
-
05
Aim the headlights
These headlights are very bright, and it's paramount that they're aimed correctly so you aren't giving other drivers any unwanted x-rays. Aiming is best done at night.
Watch the aiming video
Stuck Mid-Install?
Send us a message with a photo of where you're at. We'd rather answer a question than have you guess — and we answer every one.
Contact UsInstall Instructions
2001–2004 Toyota Tacoma
A full photo walkthrough, start to finish. Read it through once before you begin — most of the job is removal, and the wiring is straightforward once the old lights are out.
You'll need: a Phillips screwdriver, pliers, and a 10mm socket.
-
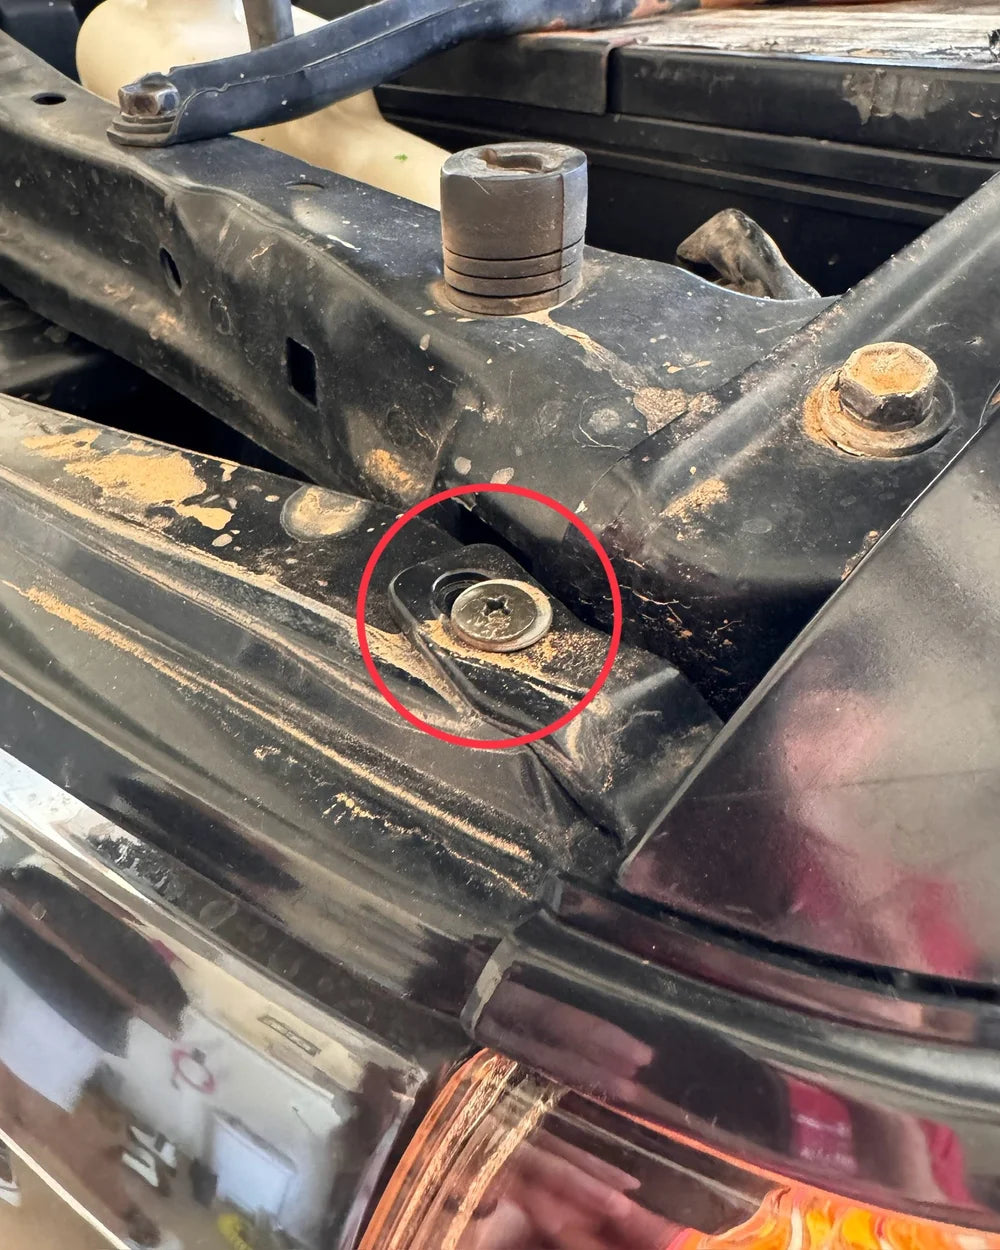 Step 01
Unscrew & Remove Marker Light
Use a Phillips screwdriver to unscrew both marker lights. They're also clipped in, so once they're unscrewed, pull the marker lights toward you. Once they're out, unclip the wires and set them aside.
-
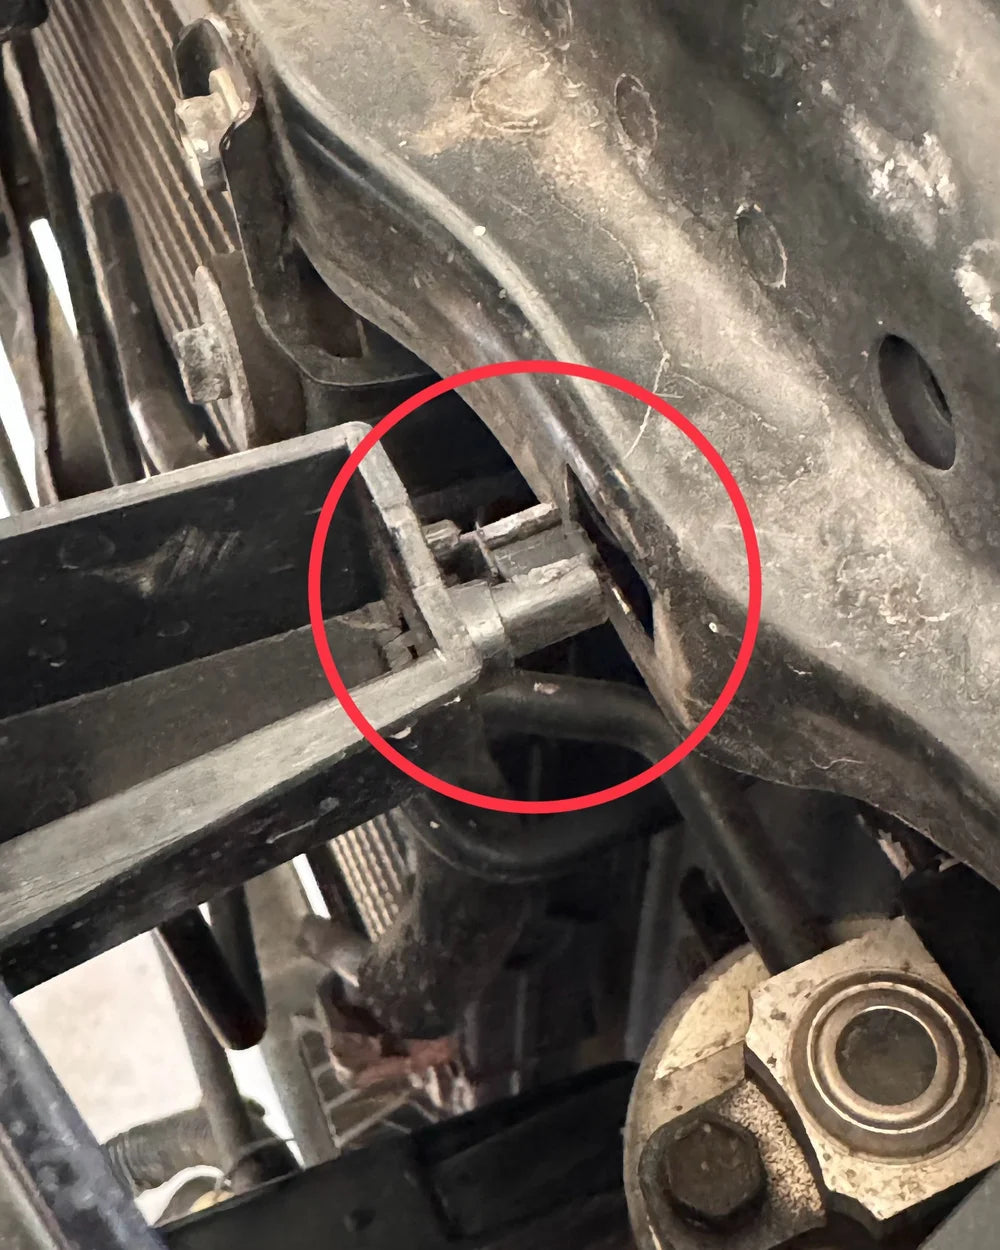 Step 02
Remove Grille
The grille is held in by a bunch of tiny, brittle clips. Use a set of pliers to press on the clips, then gently remove the grille. If you break any, replacements are available online — just search "2001-2004 Tacoma grille clips."
-
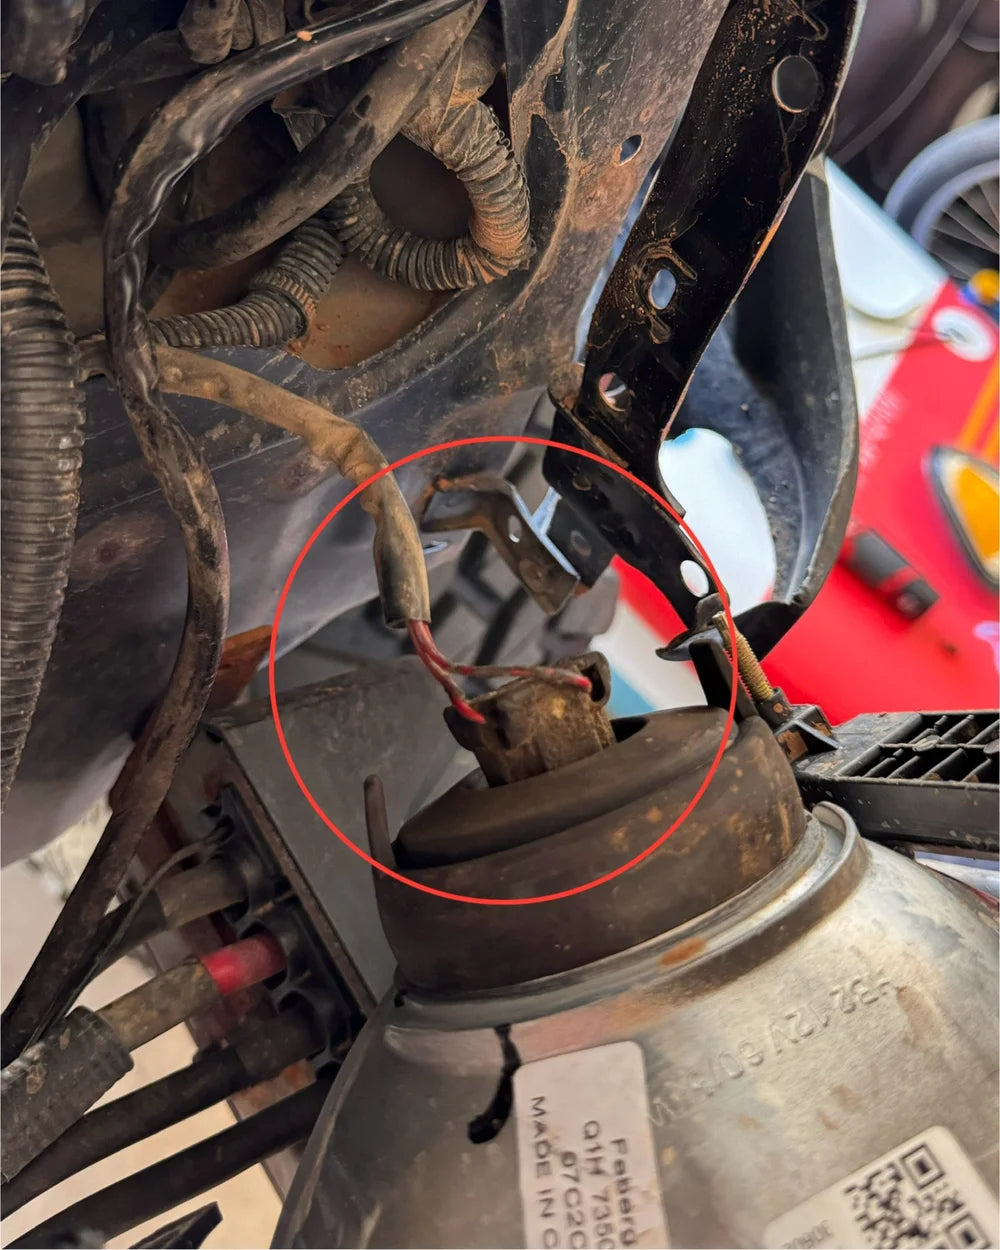 Step 03
Unplug Old Headlights
Use a little force to unplug the H4 plug from both headlights. When you install the projector harness you'll find it only has one H4 plug — this is normal. Just tuck the passenger side H4 plug away.
-
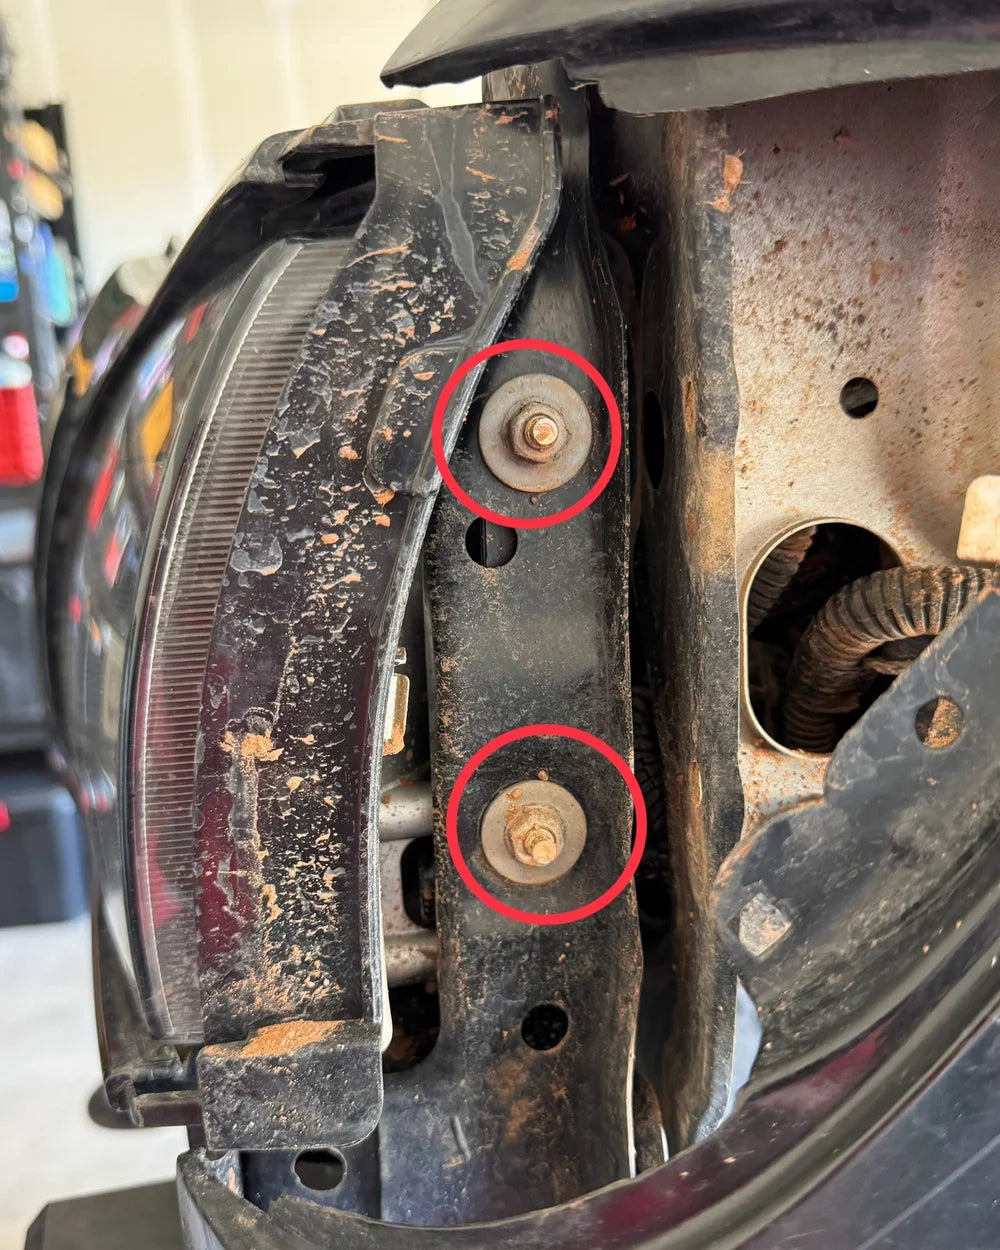 Step 04
Remove 10mm Nuts
Using a wrench or an impact, use a 10mm socket to remove the nuts on both headlights and set them aside. You'll need these to reinstall your new retrofits.
-
 Step 05
Remove 10mm Bolt
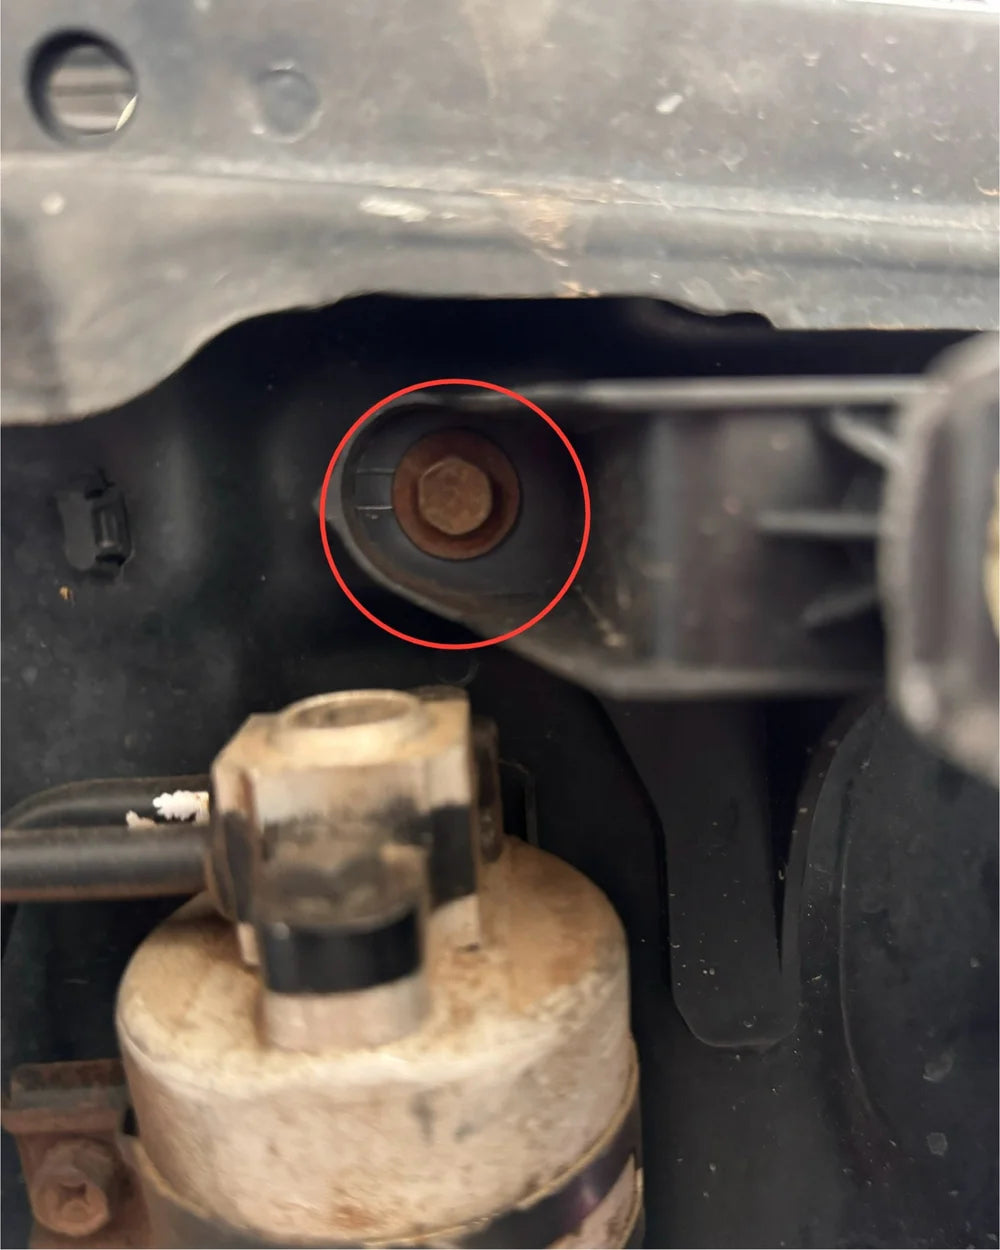
Use the same 10mm socket to remove this bolt. It's somewhat hidden behind the core support. Save this bolt too — you'll need it later.
-
 Step 06
Route Wiring Harness
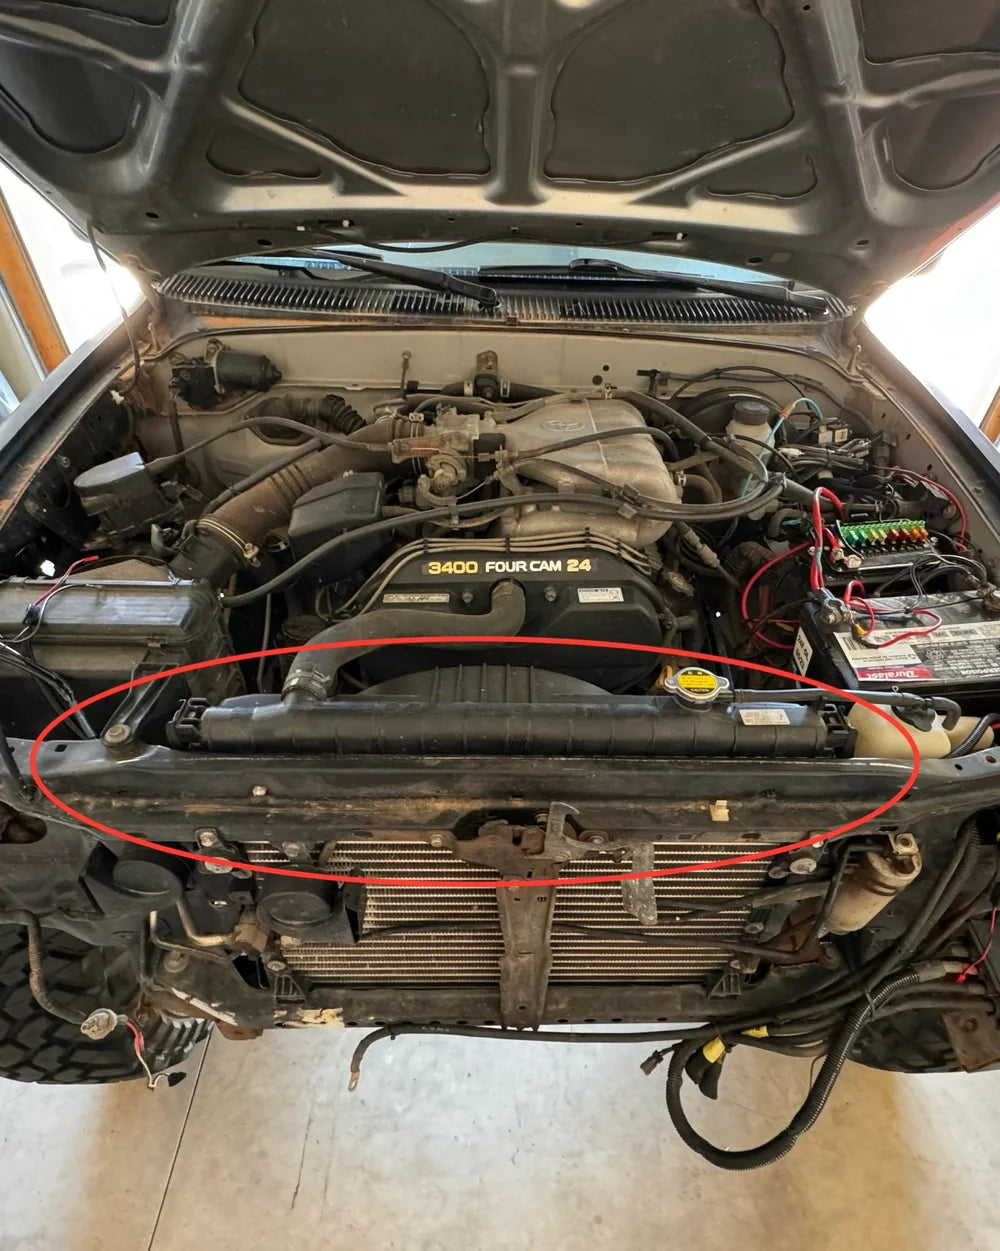
Before you put the new lights on the truck, route the wiring harness. If you have halos, you'll have a halo harness that needs routing as well. We like to hide the wires between the core support and radiator. Tuck them however you like — just make sure they're not loose or dangling onto the fan or serpentine belt.
-
 Step 07
Ground The Harnesses
Unbolt your fender bolts, place the grounding eyelets from the harness on the fender, and bolt them down with the original fender bolts. Make sure there is metal-to-metal contact. If needed, use sandpaper to remove any paint or rust where the ground wires touch the fenders. If the harness isn't grounded, your lights will not work.
-
 Step 08
Connect Projector Plugs
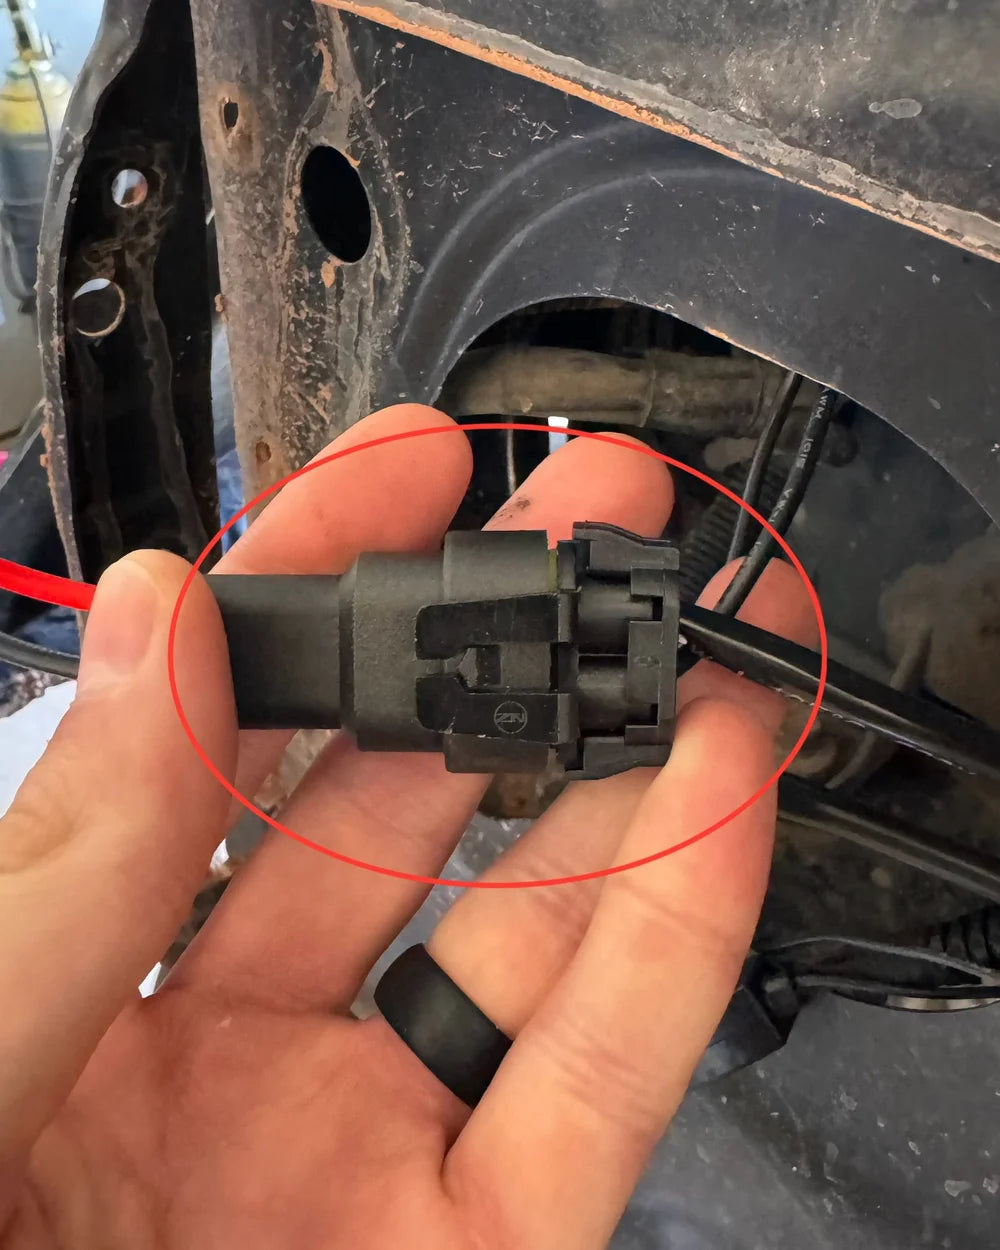
Connect the harness plugs to the plugs coming out of the back of the headlight. Don't install the lights yet — just plug everything in.
-
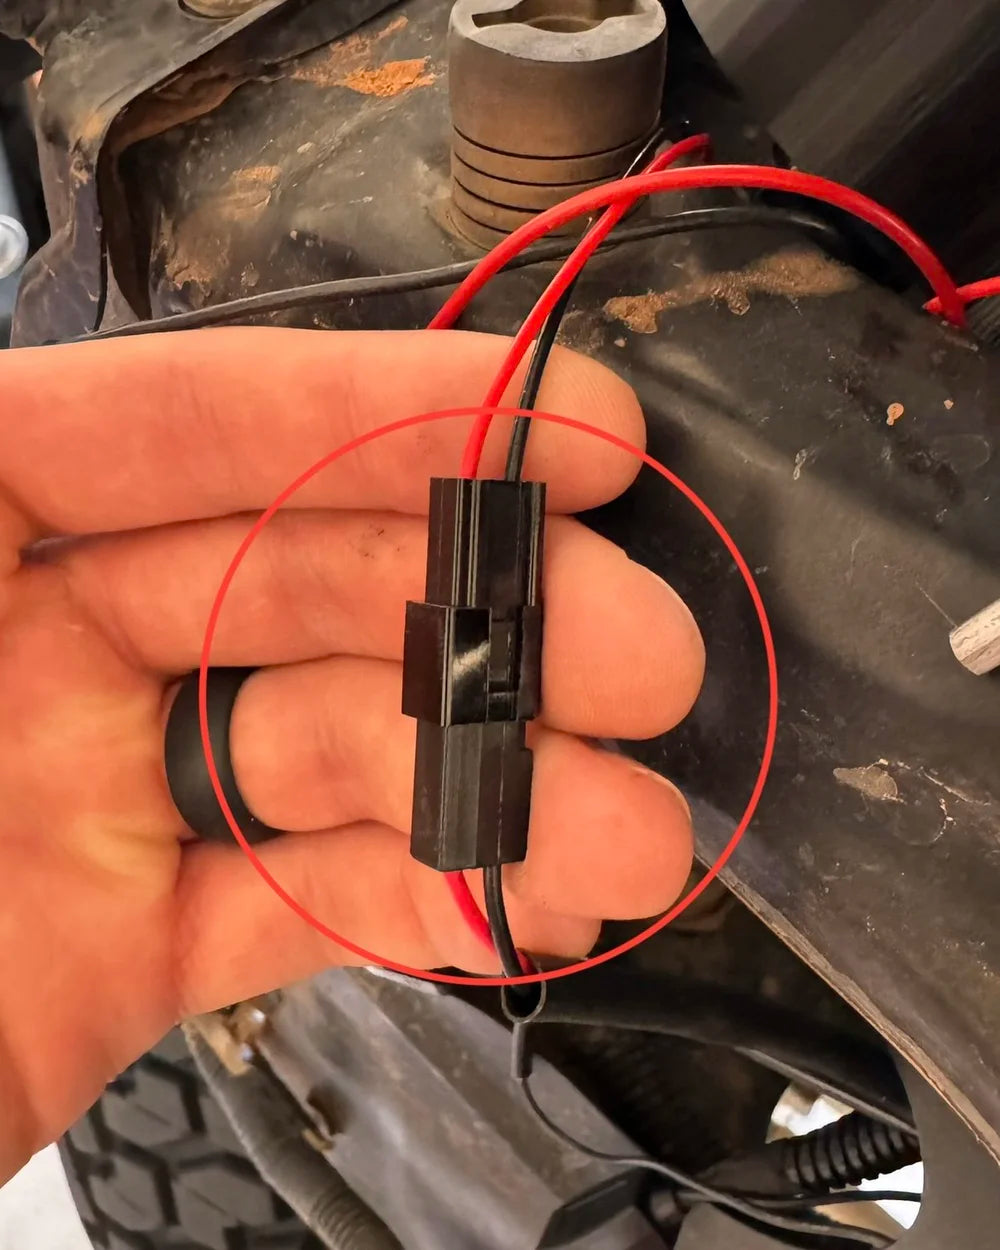 Step 09
Connect High Beam Plugs
Nothing crazy here — just make sure the connection is tight. Turn on your truck and test the high beams by flicking the high beam lever from inside the truck. You'll see them flick on and off, and you'll hear a little click from the headlights. If it doesn't work, check your connections and your grounds and try again.
-
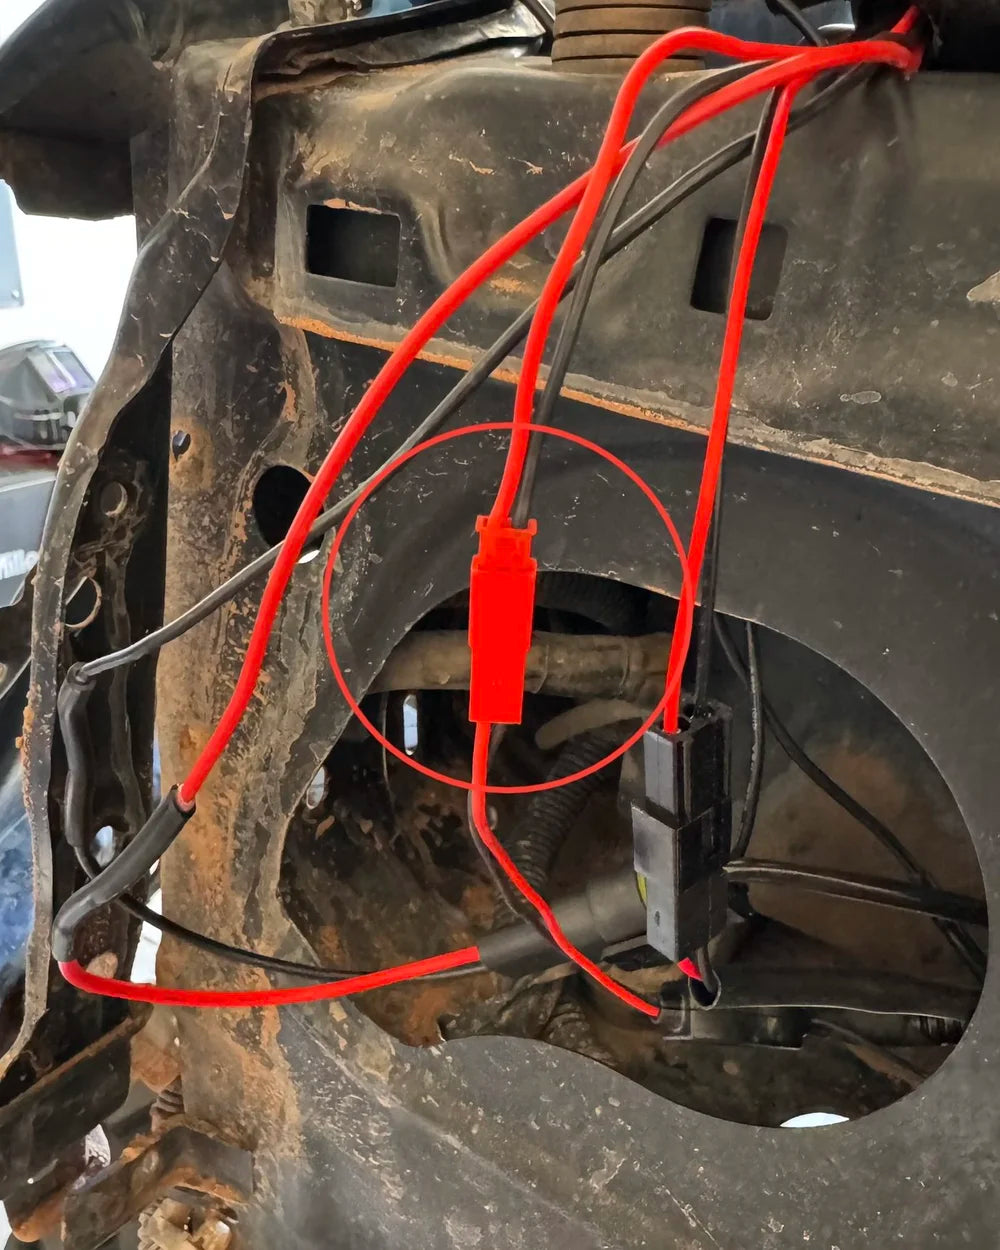 Step 10
Connect Halo Plugs (if applicable)
If you ordered halos, run the extra wire through the firewall and use the provided fuse tap to tap into the ACC fuse. That gives the halos constant power once the truck is turned on.
-
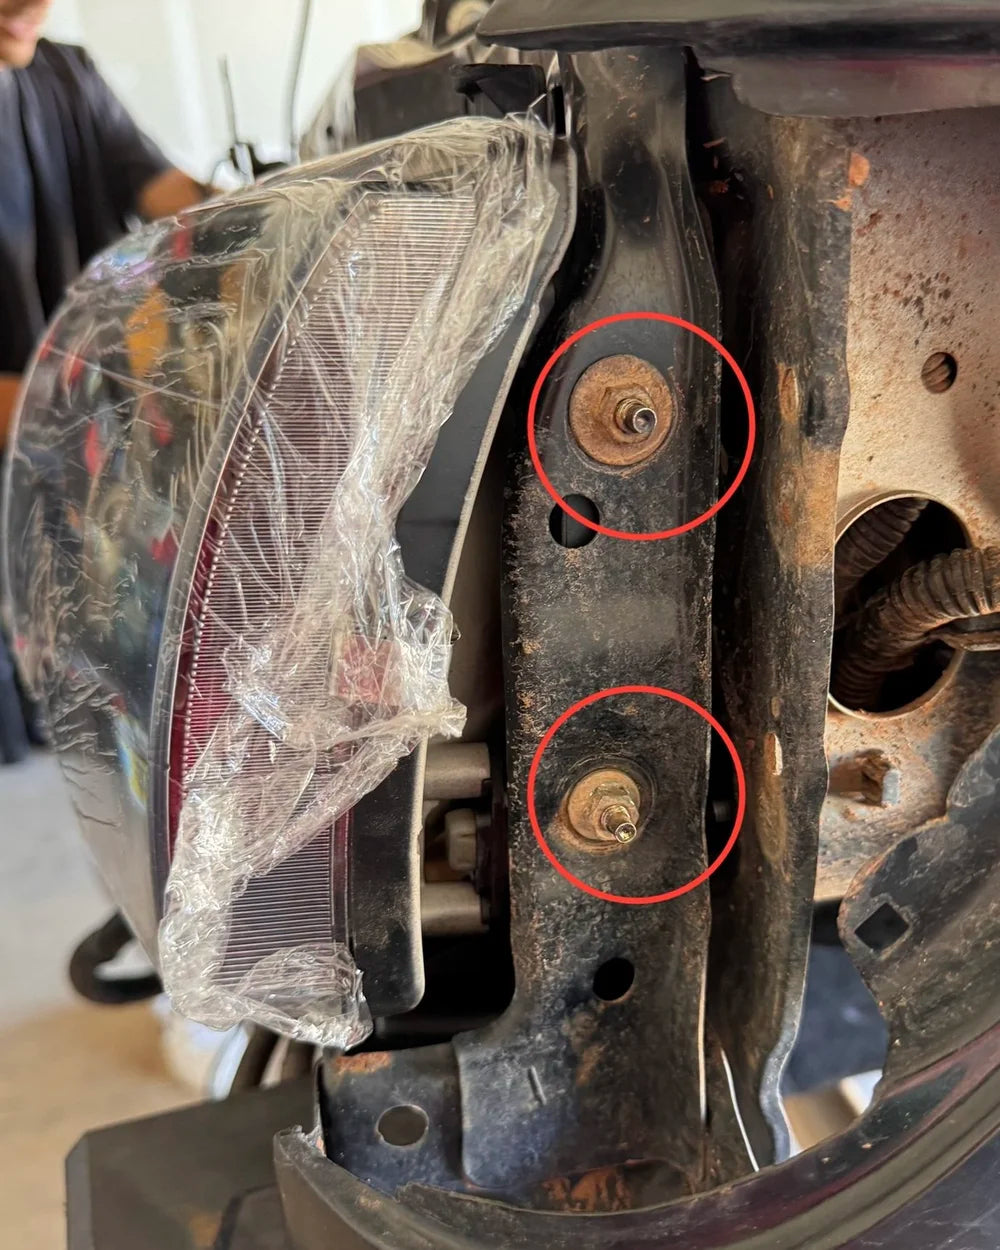 Step 11
Install New Headlights
Install the new lights the same way you took the old ones out. Remove the lens plastic once the headlight is bolted in.
-
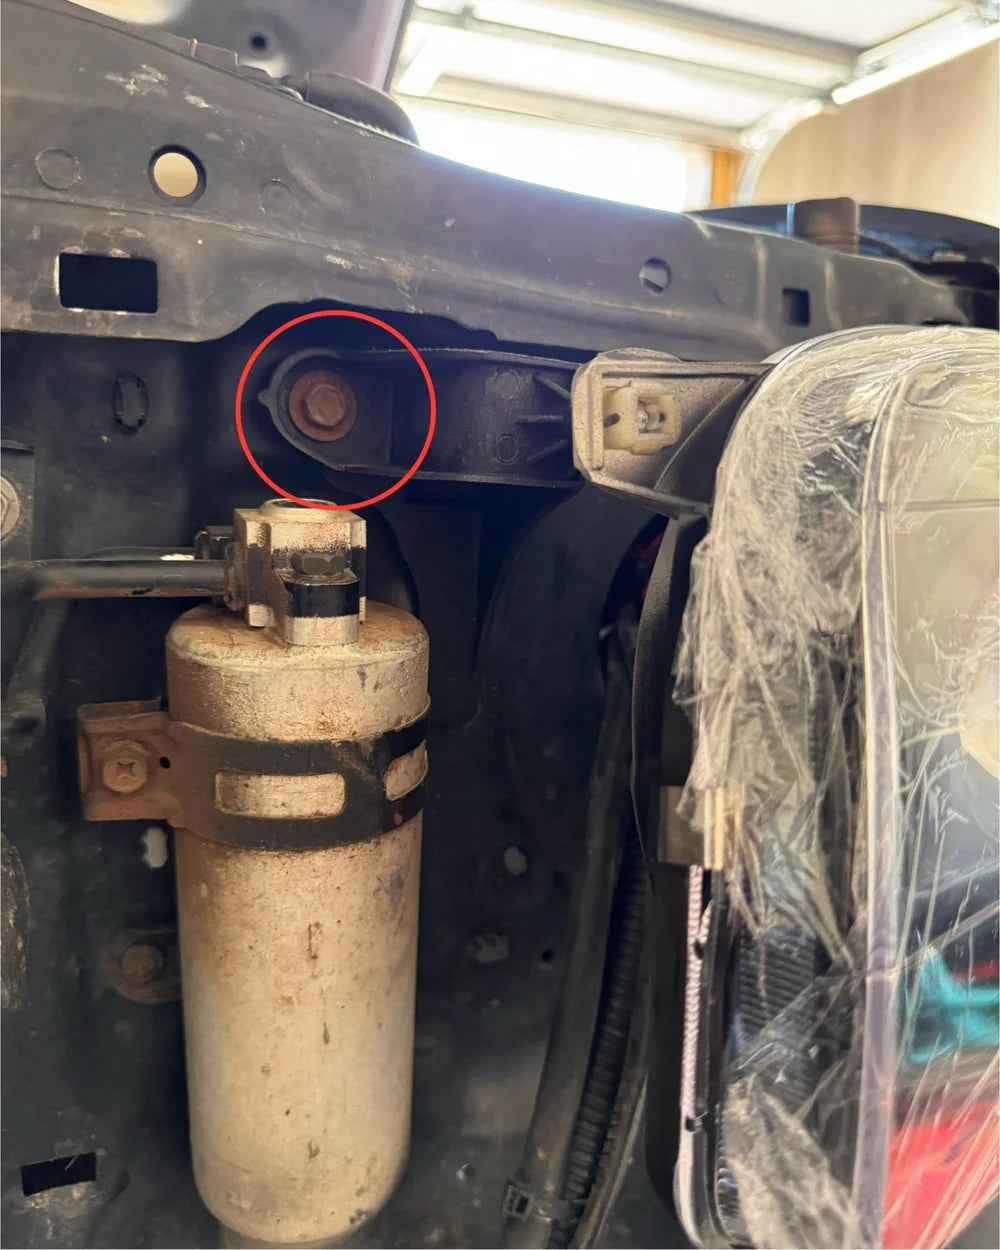 Step 12
Reinstall The 10mm Bolt
Screw the hidden 10mm bolt back in behind the core support, then reinstall the grille and marker lights.
-
 Step 13
Aim Your Headlights
Aiming is best done at night. These lights are very bright, so getting the aim right matters — for you and for everyone coming the other way.
Watch the aiming video

